Module 4 · Entries, Stop Losses & Trade Management · Lesson 5
Complete Trade Management: From Entry to Exit
Learn how to manage the complete life cycle of a trade — from setup confirmation and entry through stop placement, targets, breakeven, partial exits, trailing stops and final review.
Entry
Stop Loss
Take Profit
Trade Management
A trade is not one decision.
It is a sequence of decisions.
You decide whether the setup is valid. You decide where to enter. You decide where the trade is wrong. You decide where the realistic target sits. You decide how much to risk. And once the position is open, you decide whether anything should change.
Professional trade management begins before the trade opens and ends only after the trade has been reviewed.
This final lesson of Module 4 connects the entire execution process into one structured workflow.
Lesson Objectives
What You’ll Learn
✓ How to build a complete trade plan
✓ How to connect entry and invalidation
✓ How to evaluate target space
✓ How management rules fit together
✓ When not to interfere with the trade
✓ How to review execution afterward
The Life Cycle of a Trade
A complete trade can be broken into several stages.
Context
↓
Setup
↓
Confirmation
↓
Entry
↓
Stop & Target
↓
Position Size
↓
Management
↓
Exit
↓
Review
If one stage is missing, the trade becomes easier to manage emotionally instead of systematically.
Step 1: Start With Market Context
Before thinking about entry, understand the broader environment.
✓ What is the higher-timeframe trend?
✓ Is price trending or ranging?
✓ Where are major support and resistance levels?
✓ Where is important liquidity?
✓ What session is active?
✓ Are major economic events approaching?
Context tells you whether the trade idea belongs in the current market environment.
Step 2: Define the Setup
A setup is the collection of conditions that must exist before you even consider entering.
Direction: Bullish or bearish bias.
Location: Support, resistance or structural zone.
Liquidity: Relevant high or low available to sweep.
Condition: Specific price behavior you are waiting for.
Step 3: Wait for Confirmation
A potential setup is not yet a trade.
Confirmation is the evidence that activates the idea.
Rejection
Price fails beyond an important area.
Engulfing
Opposing momentum takes control.
BOS / CHoCH
Structure confirms changing direction.
Retest
Broken structure holds as a new level.
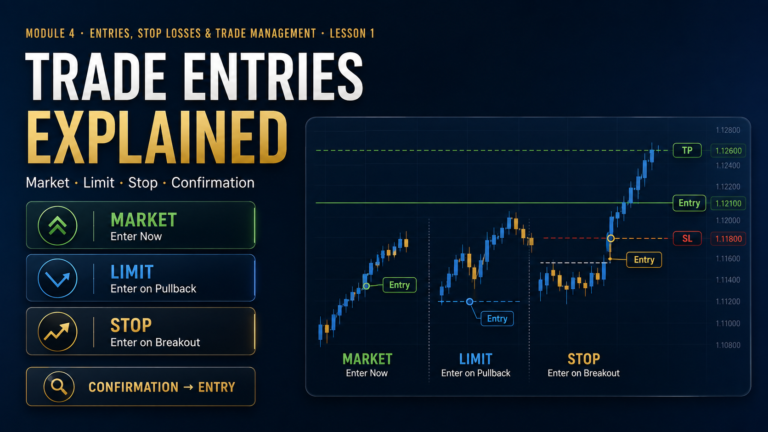
Step 4: Choose the Entry Method
Once confirmation appears, execute according to the entry rules developed earlier in this module.
| Method |
Use |
Main Tradeoff |
| Market |
Enter immediately after confirmation |
Potentially worse price |
| Limit |
Enter on retracement |
May never fill |
| Stop Entry |
Enter after price breaks a trigger level |
Can activate on false break |
Step 5: Define Invalidation and Stop Loss
The stop should answer:
“What must price do to prove this trade idea is wrong?”
Common invalidation references include:
• Structural swing low for a long trade
• Structural swing high for a short trade
• Rejection-wick extreme
• Support or resistance failure
• Strategy-specific invalidation level
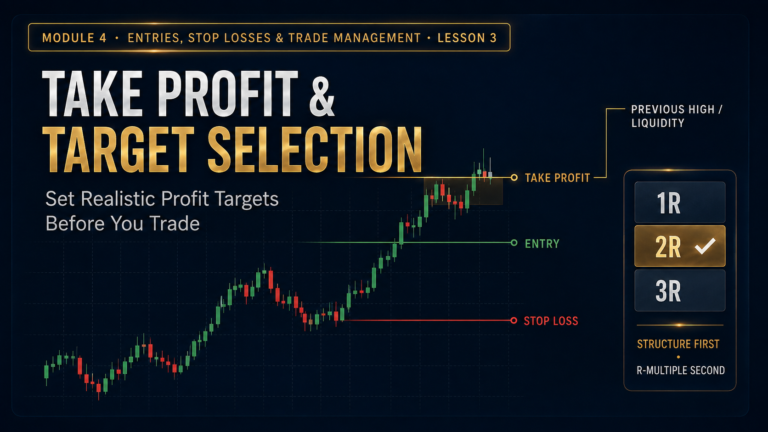
Step 6: Identify the Target
The target should be realistic relative to structure and the actual entry price.
Possible Target 1: Previous swing high or low.
Possible Target 2: Opposing liquidity.
Possible Target 3: Major support or resistance.
Final Check: Does the available reward justify the required risk?
Step 7: Use Risk-to-Reward as a Filter
A trade can have excellent technical confirmation and still fail the risk-to-reward test.
Entry: 1.1000
Stop: 1.0970 = 30 pips risk
Realistic target: 1.1015 = 15 pips reward
Available R:R = 1:0.5 → trade may not qualify.
A no-trade decision is part of professional trade management.
Step 8: Calculate Position Size Last
Once entry and stop distance are known, calculate the position size required to maintain your planned account risk.
Stop Distance First → Position Size Second
Never choose a large position first and then force the stop closer to make the numbers fit.
The Final Pre-Trade Check
✓ Setup valid?
✓ Confirmation complete?
✓ Entry defined?
✓ Stop defined?
✓ Target defined?
✓ Risk-to-reward acceptable?
✓ Position size calculated?
✓ News checked?
✓ Management rules already known?
Once the Trade Is Open, Stop Rebuilding the Plan
After entry, many traders begin analyzing from scratch every few seconds.
One candle moves against them → panic.
One candle moves in profit → move stop.
Profit grows → extend target.
Profit falls slightly → close early.
The original plan disappears.
New market information can justify a decision. Normal price fluctuation does not require constant intervention.
“Do Nothing” Is a Valid Management Decision
If the setup remains valid, the stop is correctly placed and no management trigger has occurred, there may be nothing to do.
Trade remains above bullish invalidation.
No opposing structure break has occurred.
Management trigger has not been reached.
Best action: leave the trade alone.
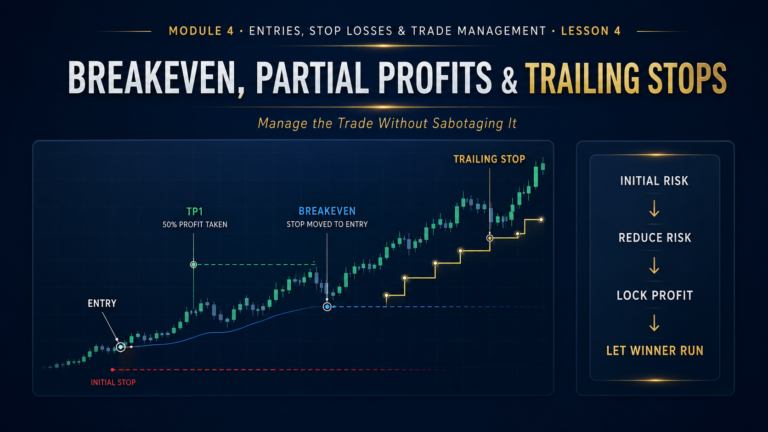
When Does Breakeven Enter the Process?
Breakeven should occur only when the predefined management condition is met.
Example Rule:
Move stop to breakeven only after price reaches 1R and establishes a new protected swing.
When Do Partial Profits Enter the Process?
Partials should also be predetermined.
TP1: 1R — close 25%
TP2: 2R — close another 25%
Runner: Remaining 50% follows trailing-stop rules.
These percentages are only an example. The real structure should be tested before being added to a trading plan.
When Does the Trailing Stop Begin?
A trailing stop should not automatically start from the moment of entry unless that is specifically how the system was designed.
Example
Entry → 1R → New Structure → TP1 → Begin Structural Trail
Letting a Winner Run Requires a Plan Too
“Let your winners run” sounds simple until open profit begins disappearing during a pullback.
Without an exit rule, traders often either close too early or hold until most of the profit disappears.
A runner needs an exit condition just as much as the original trade needed an entry condition.
When Is an Early Exit Justified?
Some strategies permit exiting before the original stop or target if important new information appears.
✓ Opposing structure breaks decisively
✓ Strong displacement develops against the trade
✓ Major target zone rejects violently
✓ Protected swing fails
✓ Strategy-specific exit signal appears
“I feel nervous” is not the same thing as new market information.
If the Stop Is Hit, the Trade Is Finished
When genuine invalidation occurs, accept the result.
Do not immediately re-enter simply because you want the money back.
Trade stopped out.
Emotional response: frustration.
Professional response: record outcome.
Wait for an entirely new setup before risking again.
If the Target Is Hit, Do Not Rewrite History
Price may continue after your take-profit level.
That does not automatically mean the exit was wrong.
Target planned at 2R.
Trade closes at 2R.
Price later reaches 4R.
The 2R trade was still executed correctly if that was the plan.
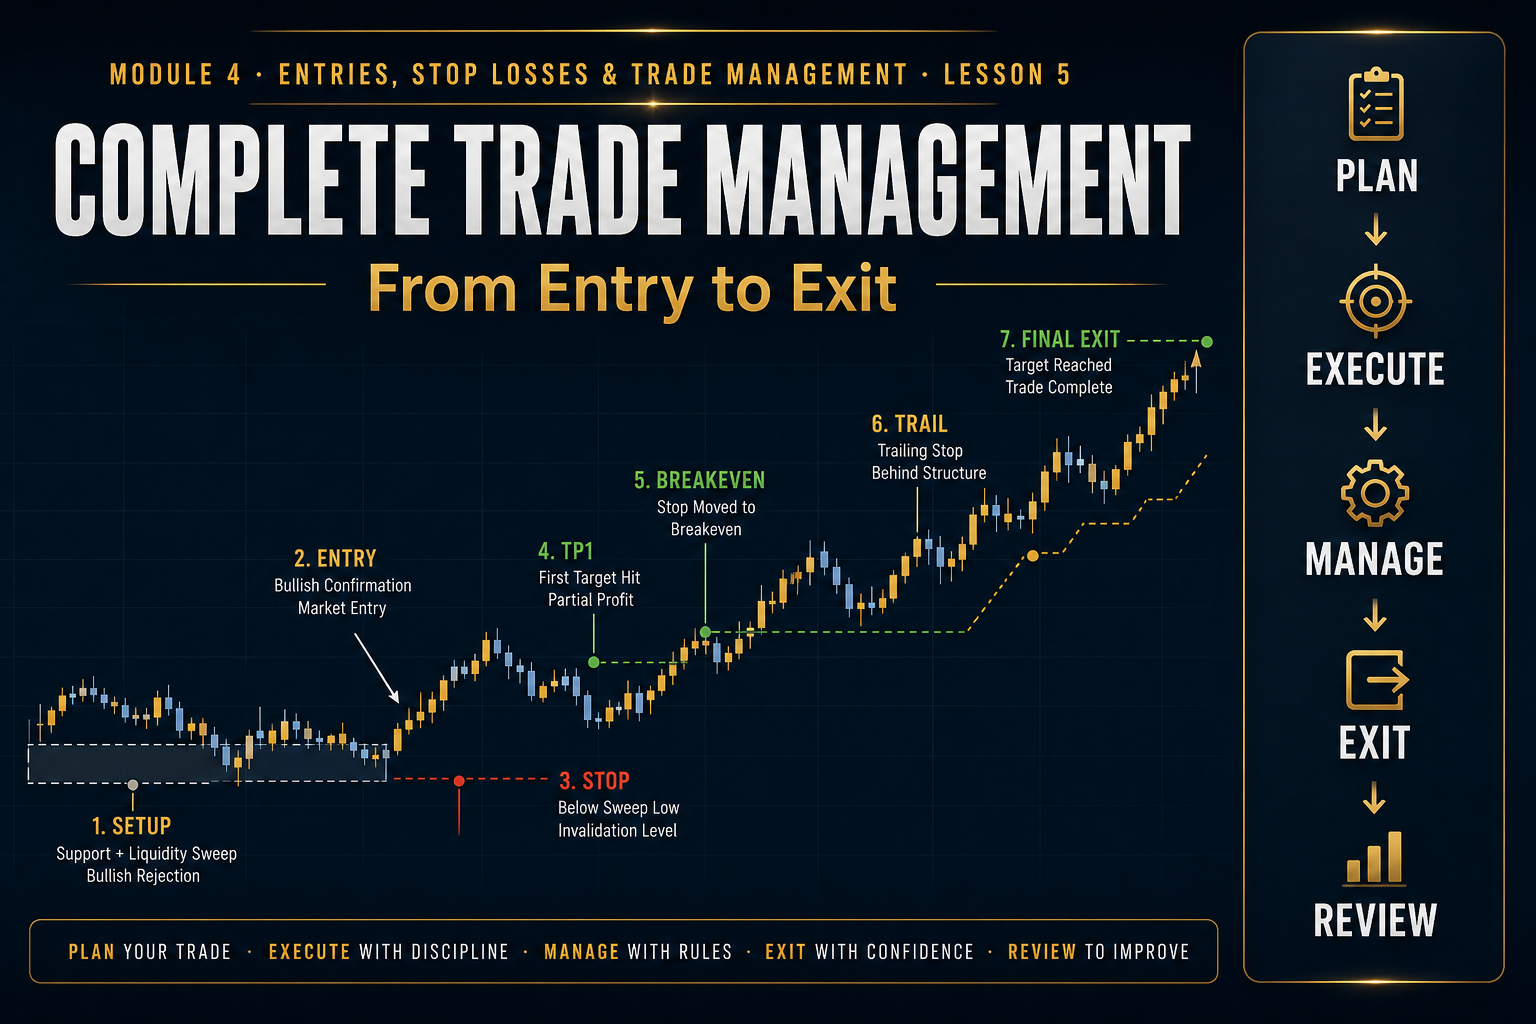
Complete Bullish Trade Example
Full Trade Life Cycle
Context: Higher timeframe bullish.
Location: Price returns to support.
Liquidity: Previous low is swept.
Confirmation: Bullish engulfing + CHoCH.
Entry: Market buy after confirmed candle close.
Stop: Below structural sweep low.
Target: Previous swing high at approximately 2.5R.
At 1R: No adjustment.
At 1.5R: New higher low forms.
Management: Stop advances beneath protected structure.
At 2R: Close 50%.
Final Exit: Remaining position reaches target.
Complete Bearish Trade Example
Context: Higher timeframe bearish.
Location: Rally reaches resistance.
Liquidity: Previous high is swept.
Confirmation: Bearish engulfing + structural break.
Entry: Short after confirmation.
Stop: Above the sweep high.
Target: Opposing sell-side liquidity.
Management: Trail behind new lower highs.
Exit: Final portion closes at planned structural target.
A Well-Managed Trade Can Still Lose
This is one of the most important lessons in the entire academy.
Setup was valid.
Entry followed the rules.
Stop was correctly placed.
Position size was correct.
No emotional interference occurred.
Market still hit the stop.
That is not automatically a bad trade. Trading deals in probabilities, not certainties.
A Winning Trade Can Still Be Poorly Managed
Profit alone does not prove good execution.
Trader enters without confirmation.
Uses oversized position.
Removes stop during drawdown.
Price eventually reverses.
Trade makes money — but the process was poor.
Evaluate the quality of your decision separately from the outcome of one trade.
The Trade Is Not Finished Until It Is Reviewed
Journaling closes the feedback loop.
✓ Screenshot before entry
✓ Setup type
✓ Entry reason
✓ Stop placement
✓ Planned target
✓ Management decisions
✓ Final R result
✓ Rule violations
✓ Lesson for the next trade
Score the Process, Not Just the Profit
Good Loss
All rules followed. Market hit the planned stop.
Bad Win
Rules broken, risk exceeded, but the market happened to move favorably.
The good loss strengthens discipline. The bad win can reinforce dangerous behavior.
A Simple Post-Trade Execution Score
Setup Quality: /10
Entry Discipline: /10
Risk Discipline: /10
Management Discipline: /10
Overall Rule Compliance: /10
Common Full-Trade Management Mistakes
Entering Without a Complete Plan
Entry, stop, target and risk should be understood before execution.
Changing the Stop Because of Fear
Stops should respond to strategy rules, not discomfort.
Changing the Target Because of Greed
Extending targets without justification rewrites the original trade.
Moving to Breakeven Automatically
Reducing financial risk too quickly can interfere with technically valid trades.
Overmanaging Every Candle
Not every small fluctuation contains actionable information.
Judging Quality Only by Profit
A disciplined loss can be a better trade than a reckless winner.
Skipping the Review
Without reviewing execution, the same mistakes can repeat indefinitely.
The Complete Trade Management Framework
1. Determine market context.
2. Identify the setup and location.
3. Wait for required confirmation.
4. Define the entry method.
5. Define invalidation and stop loss.
6. Identify realistic target.
7. Confirm risk-to-reward.
8. Calculate position size.
9. Execute only when every required condition is present.
10. Follow predefined breakeven, partial and trailing rules.
11. Exit according to stop, target or valid management signal.
12. Journal and review the trade.
Build a Complete Trading Process
Learn to Manage the Entire Trade — Not Just the Entry
Financial Markets Academy offers live 1-on-1 mentorship for traders who want to develop structured entry, stop-loss, target, risk and trade-management rules that can be applied consistently in live markets.
Reserve Your Seat →
Complete Trade Checklist
✓ Is the market context clear?
✓ Is the setup at a meaningful location?
✓ Has confirmation occurred?
✓ What is my exact entry?
✓ Where is the trade invalid?
✓ What is the realistic target?
✓ Does the trade meet my required R:R?
✓ Is position size correct?
✓ What are my management rules?
✓ What triggers breakeven?
✓ Are partial exits allowed?
✓ How will the stop trail, if at all?
✓ What ends the trade early?
✓ Will I review the execution afterward?
Frequently Asked Questions
When does trade management begin?
Trade management begins before entry because stop placement, target selection, risk and management rules should already be defined before the trade opens.
Should I manage every trade actively?
Not necessarily. Some strategies use active management while others use a set-and-forget approach. The method should be part of a tested trading plan.
Can a correctly managed trade still lose?
Yes. Proper execution controls risk and improves consistency, but it cannot eliminate uncertainty or guarantee a winning outcome.
Can a winning trade still be a bad trade?
Yes. A trade can make money despite poor execution, oversized risk or broken rules. Outcome and decision quality should be evaluated separately.
When should I close a trade early?
Only when a predefined management rule or meaningful new market information justifies an early exit.
Why should I journal trades after they close?
Reviewing trades helps separate good and bad decisions, identify recurring mistakes and measure whether your strategy and management rules are being followed consistently.
Test Yourself
Module 4 · Lesson 5 Knowledge Quiz
1. When should trade management rules ideally be decided?
A. Before entering the trade
B. Only after profit appears
C. Only after a losing trade
D. Whenever emotions change
2. What should determine the stop loss?
A. Trade invalidation
B. Desired lot size
C. A random number
D. Daily profit goal
3. Can a losing trade be well executed?
A. Yes
B. No
C. Only on higher timeframes
D. Only when using a trailing stop
4. What should trigger an early exit?
A. A predefined rule or meaningful new market information
B. Temporary nervousness
C. Any opposing candle
D. Social media commentary
5. Why review trades after they close?
A. To evaluate execution and identify improvement areas
B. To change every rule immediately
C. To predict the next trade
D. To avoid taking losses
Answer Key: 1. A · 2. A · 3. A · 4. A · 5. A
Key Takeaways
✓ Trade management starts before entry.
✓ Context determines whether the setup belongs in the current market.
✓ Confirmation activates the setup.
✓ Entry, stop and target must work together.
✓ Position size is calculated after stop distance is known.
✓ Breakeven, partials and trailing stops require predefined rules.
✓ Not every open trade needs active intervention.
✓ A losing trade can still be professionally executed.
✓ A profitable trade can still contain dangerous mistakes.
✓ The trade is not truly complete until it has been reviewed.
Module 4 Complete
Entries, Stop Losses & Trade Management — Complete
You now have the foundation for executing a trade from start to finish instead of treating entry, risk and exits as separate decisions.
Lesson 1: Market, limit, stop and confirmation entries
Lesson 2: Stop-loss placement and invalidation
Lesson 3: Take-profit and target selection
Lesson 4: Breakeven, partial profits and trailing stops
Lesson 5: Complete trade management from entry to exit
Next Module
Module 5: Trading Sessions, Timing & Market Conditions
You now know what to trade and how to manage it. In Module 5, we focus on when to trade — including London and New York sessions, market opens, volatility windows, news releases and how market conditions change throughout the trading day.
Continue to Module 5 →
Financial Markets Academy provides educational information only. Nothing in this lesson constitutes financial or investment advice or a guarantee of trading performance. Trading leveraged financial markets involves substantial risk and may not be suitable for everyone.